Before you set up your email account on outlook, your domain name must be registered and the email account created in your Cpanel or the dashboard of your email service provider. Once this is settled, follow the steps below:
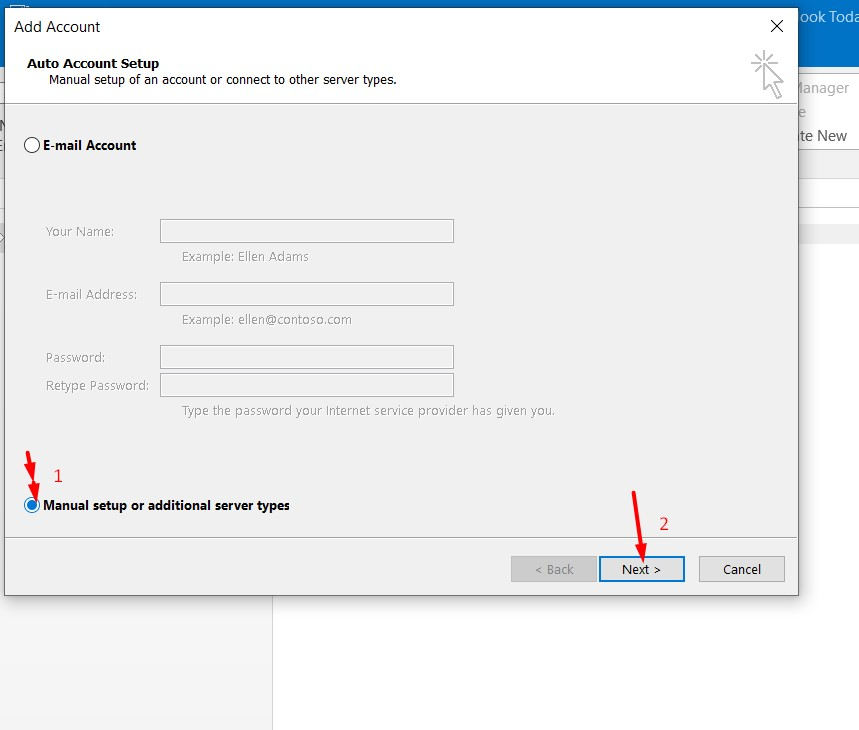
- Open up your Outlook email application. Click on Manual Set up or additional server type. Click on Next.

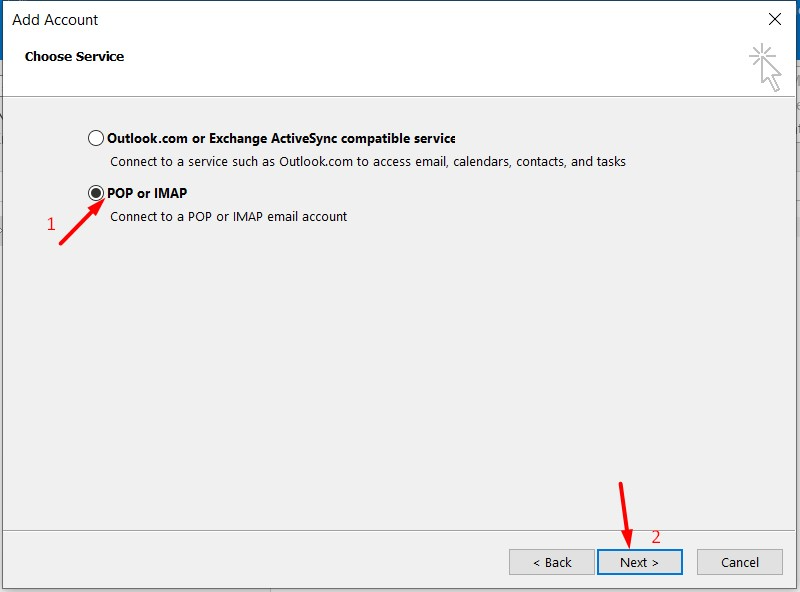
- On the Add account section, choose the POP or IMAP option and click Next.
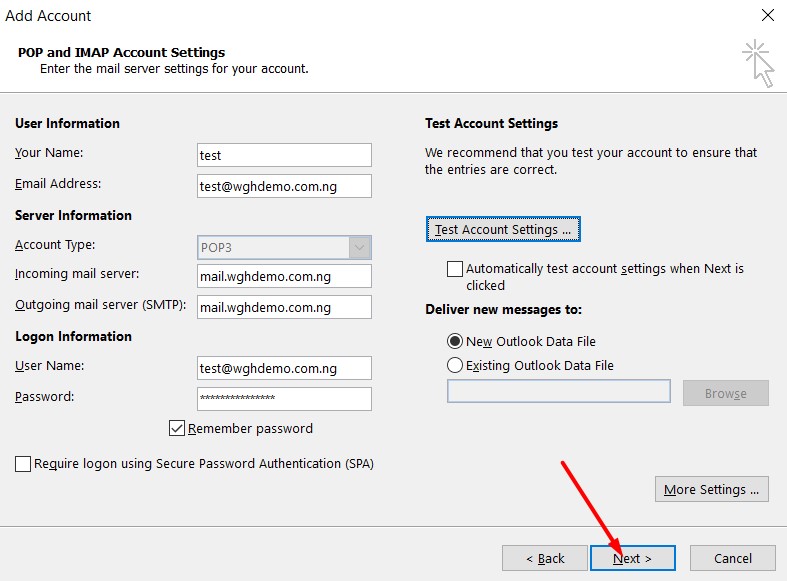
- For the POP and IMAP Account Settings, provide the information below:
User Information
Your Name: Enter your first and last name or the display name of your choice.
E-mail Address: Enter your e-mail address.
User Name: Enter your e-mail address
Password: Enter the password you set up for your e-mail account.
Server Information POP3
Incoming Mail Server (POP3): mail.yoursite.com
Outgoing Mail Server (SMTP): mail.yoursite.com
OR
IMAP
Incoming Mail Server (IMAP): mail.yoursite.com
Outgoing Mail Server (SMTP): mail.yoursite.com
Logon Information:
E-mail Address: Enter your address. Password:
Enter the password you set up for your e-mail account. Click on More settings
On the Internet E-mail Settings window, select the "Outgoing Server" tab. - Select "My outgoing server (SMTP) requires authentication." Mark the option for User Same settings as my Incoming mail server. Click on Ok.
Select the "Advanced" tab and use the following details
If the Encryption Type is NONE:
POP3: Incoming server port: 110 Outgoing Server(SMTP): 25 or 26 or 587
IMAP: Incoming server port: 143 Outgoing Server(SMTP): 25 or 26 or 587
If the Encryption Type is SSL:
POP3: Incoming server port: 995 Outgoing Server(SMTP): 465
IMAP: Incoming server port: 993 Outgoing Server(SMTP): 465
- Click Next.

- Wait for the email account to be tested and if it is successful, click on Finish.
